Thursday, 29 October 2015

Work Diary- Shoot 8(Filled Images)


For my 8th shoot I created 4 images similar to the image displayed. I created these images by using an outline of a person and filling in the inside or outside of the persons outline. To the left is the only image I was happy with from the shoot. I like how this can display a persons inner thought which they do not share. I get this interpretation from how the image is bound by the persons outline. I like how this image shows the sun and the oranges and yellows which I created during a sunset. This is an intriguing way to a certain area or idea and helps to keep focus on a certain area. 


Straight Images- Shoot 8 (Filled Images)


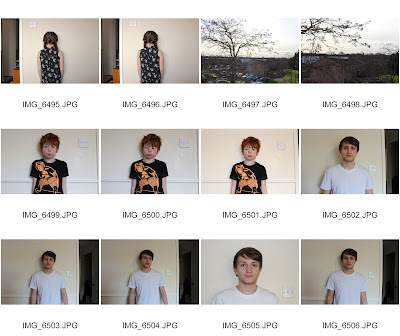
Contact Sheets- Shoot 8(Filled images)


Monday, 26 October 2015

Work Diary- Shoot 7(Multiple Imagery)


For this soot I planned to produce a selection of images based on multiple imagery.

Above are two images from my shoot. I really enjoyed taking these images and felt it was a fun and creative shoot. I think the multiple imagery to the right displays a fun friendship. I like how the image develop down the multiple imagery and the way the calm and fun atmosphere produced from the expressions on the girls faces.On the right is a contrast to this fun atmosphere and is a dark and very powerful image, I decided to join two image together through an animation as I felt it worked well and appeared slightly surreal. I think there is a smooth transition from the close eyes and them opening and it helps to produce a very nice and interesting image. 

Straight Images- Shoot 7(Multiple Imagery)


Contact Sheet- Shoot 7 (Multiple Imagery)


Thursday, 22 October 2015

Work DIary(shoot 6)


For this shoot I took two images add decided to try a scatter effect I had saw online. I created this image by first duplicating the layer which the image would placed on. I then adjusted the background layer with the liquefy tool and moved the person around and stretched them out. I then used the rubber tool to randomly rub out sections of the top layer to reveal areas of the adjusted liquefy layer. The image to the left represent my first attempt at this technique. I think this one did not work as well as the second image. However I am very happy with the image on the right. I decided a use a selection of different rubber sizes and shaped to create this faded effect. I think it works well. I image almost looks like a psychical experiment and as if it has been hole punched many times. 

Straight Images- Shoot 6(Photoshop Techniques)


Tuesday, 20 October 2015

Mid-Project Evaluation

So far within my project I have completed a variety of shoots including various techniques and photographic editing. I like how my ability within Photoshop is developing and the new understanding I have of my camera. I started this project with the aim to explore different areas of photography and develop skills. I have completed a total of 16 shoots including the first 11 technique based shoots and I am very pleased with the outcome so far.
At first I had planned to work on more surrealism pieces after my initial 11 technique based shoots, however I have continued to explore new techniques within my main shoots for the project as it has been extremely interesting and beneficial. My next 8 shoots are planned out and I am excited to explore these topics and areas as well. I think I have approached photographic realities in a unique way and am happy with my current images produced so far.
Overall I am pleased with the current results of my project and hope to continue to create interesting images which reflect my project brief of photographic realities.

Monday, 19 October 2015

Work Diary- Shoot 5(Animations)


For this shoot I only produced one image as after editing some images I was extremely disappointed with the results however wished to move on instead of spending a vast amount of time on an idea which I was no longer sure on. I like how the movement of water is shown within the image and the way in which it displays the change within the light. The reflect of the light off the water adds interesting highlights to the image. I like the cool tone and calming atmosphere produced from this image. 

Straight Images- Shoot 5(Animations)


Contact Sheet- Shoot 5 (Animation)

Thursday, 15 October 2015

Work Diary- Shoot 4(Animations)

Plans and expectation 

For this shoot I plan to develop my images and create animations. I feel this a goo way to proceed from my work on close ups and I have gained skill within my ability taking images and knowledge. Now I can proceed to work on developing my ability on editing images.

Evaluations

This animation involved several different layers and images. I created this animations as described within a previous technique page. I like how the model moves slightly between each frame as it represent a realistic  sense of motion. The beauty of her make up is enhanced due to the various angles which we see it. I think this image shows are we are constantly aware of what is around us and our curiosity. I gather this interpretation form the amount of movement which her eyes have from opening them. Showing how once our eyes are open we begin to notice small details around us and explore us surroundings.

Straight Images- Shoot 4(Animations)

Contact Sheet- Shoot 4(Close up Animations)


Monday, 12 October 2015

Work Diary- Shoot 3(Close Ups)

Plans And expectations 

This shoot was not initially planned. The weather on a particular weekend provided a beautifully detailed setting allowing some interesting photos to be produced.

Evaluations
Original
Edited

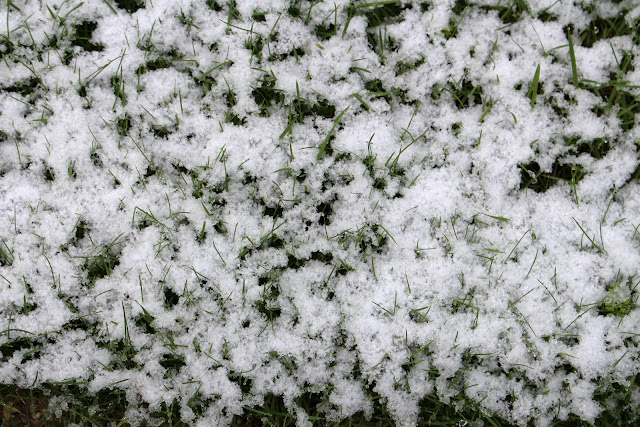
As shown within the two images I did not edit this image much, I only applied a curve adjustment. I added this curve adjustment to make the background bright create a brighter image. I like the way in which the snow and ice sits on the grass and the colours produce and very calming and cooling atmosphere however with a positive attitude due to the greens present within the piece. 
Displayed to the left is the camera setting and details for this image. 
One aspect of this image which I am not happy about is its lack of detailed focus on certain areas. 


This piece is another image which I produced within my third shoot. This image is an example of a diptych. I have explained how to create this many times within previous shoots and a technique page. 
I decided to display the images like this as I felt it enhanced the detail of the ice/snow. I really like how the cool tones within this image have produced a very nice and natural image which is not to bright or harsh on the eyes.

Progression

I hope to use the skills and new understand of my camera to improve my images for later shoots. I feel I have explored close ups enough however I now wish to give close ups a more surreal effect by turning them into animations. 

Straight Images- Shoot 3(Close Ups)


Contact Sheet- Shoot 3 (Close Ups)


Thursday, 8 October 2015

Work Diary-Shoot 2(Close ups)

PLANS AND EXPECTATIONS

My second shoot will consist of close ups and experimentation of depth of field. I have decided to continue with close ups for another shoot to help work on my focus and consistency of good images. A photographer which influenced this shoot would be Ross Hoddinott. This photographer mainly works with nature however I chose to work with objects and Christmas decorations to display a happy atmosphere linked to Christmas which is approaching.

EVALUATIONS

Original
Edited


 This particular image was a close up of a special Christmas ornament. Although there is no detailed message behind the image it does spread a positive atmosphere and produces and Christmas vibe. I adjusted this image into black and white as I felt it gave it a dramatic feel and shows how Christmas it is not always bright and happy but should still be seen as a positive time filled with fun.

Top the left i have taken a screenshot displaying the layers, adjustments and how I adjusted the colours. Before I changed the image into clack and white a added two curves lays to highlight certain aspects of the image and provide stronger colours.
As shown in the screenshot i adjusted some of the way in which certain colours appear and there tones. I done these whilst viewing the image and had no particular order however just based it on what appealed most to the eye.

To the right the camera setting and details are shown. My camera was set to f/5.6, this was to create a shallow depth of field shown within the image. This setting helped to enhance the object and maintain a focal point of the object. However I feel that the flash could have been different and the image could have been improved by an external flash source to the camera.


This image is an example of a photo joiner. I'm unable to show an original and the edited versions due to the way in which this image consists of multiple images. This particular multiple image consists of only four images. This image has a very similar atmosphere to the perviously talked about piece. I took this image and edited it this particular way to display the fun and carefree side of Christmas through the arrangement of the images and creative side behind the image. 
For this image I created a new document and placed the four images onto it, allowing me to move and adjust images separately. I changed the size of each individual to 6cm by 4cm with a 300 resolution within the setting of the crop tool and applied this to all images Before placing them in the new document i had created. After positioning these images in the desired place i added a curve and levels adjustment To enhance contrast and colour within in image. 
Again with these images I used very similar setting to above with a f setting of 5.6 to create this shallow depth of field enabling a clear focal point of the object, even though the image was taken much closer to the object and background. 

PROGRESSION  

I think an improvement of these image would be to use a different flash to the one build into the camera . I think this shoot was successful and I did produce some interesting close ups which I then also developed future in Photoshop. Although I would not take image including these particular I will take these skilled I have devolved and learnt onto my shoots in the future. I wish to continue to explore different areas of photography and use a variety if techniques. 

Straight Images-Shoot 2 (Close ups)


35mm Focal Length
1/50 Seconds shutter speed
ISO 400
f/5.0
52mm Focal Length
1/60 Seconds shutter speed
ISO 400
f/5.6
28mm Focal Length
1/40 Seconds shutter speed
ISO 400
f/4.0